All guides
No guide matches your search.
Plan projects and tasks on the timeline
Show tasks as bars on a time scale, group them by project and zoom from days to months. Users can drag a task to move it or change its length.
On this page
MxTimeline draws dated items as bars under a time scale. It lives in the Mordex.Windows.Timeline namespace.
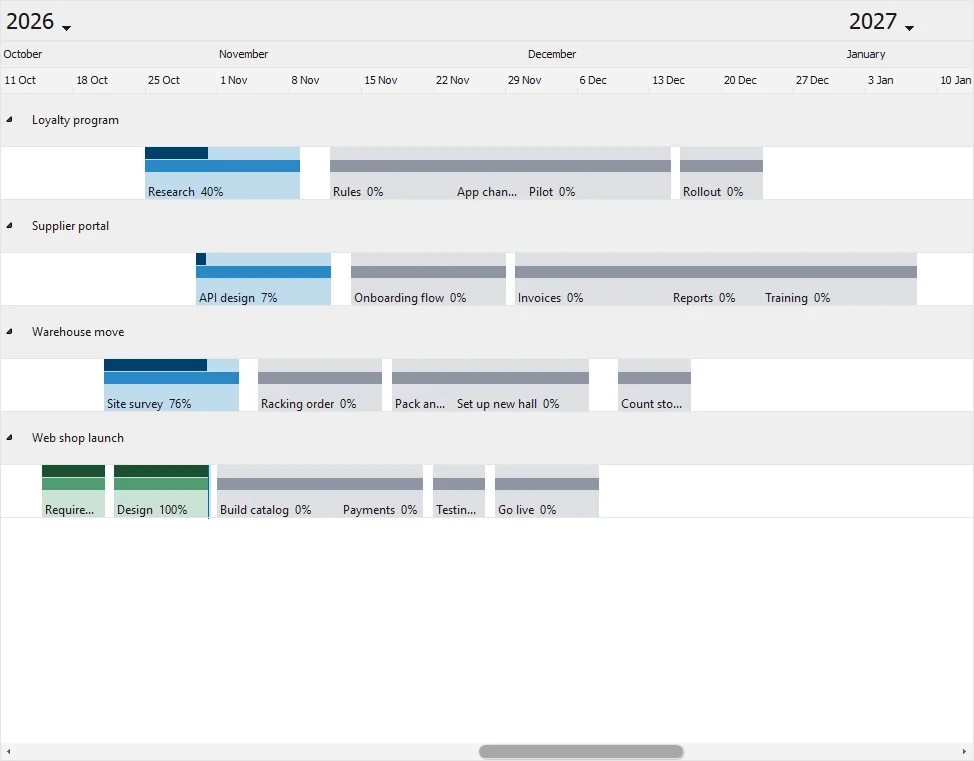
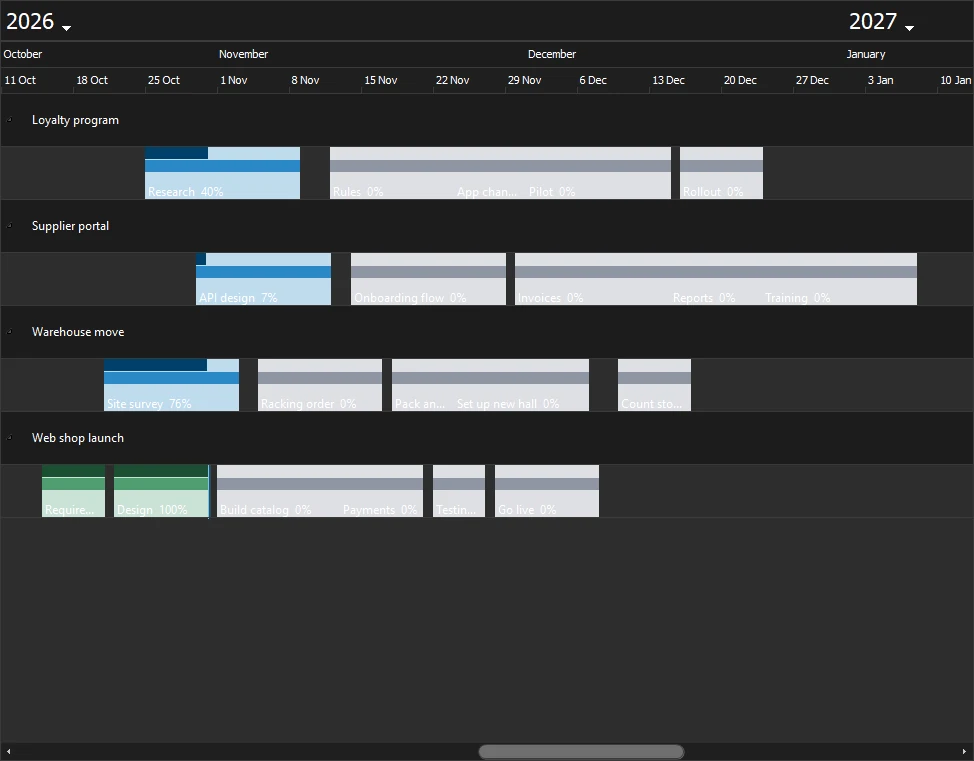
Four projects on a week scale
Add a timeline to a form
Drag MxTimeline from the toolbox to a form, or create it in code.
using System;
using System.Windows.Forms;
using Mordex.Windows.Timeline;

MxTimeline timeline = new MxTimeline();
timeline.Dock = DockStyle.Fill;
Controls.Add(timeline);
Add tasks
Each bar is a TimelineItem with a start, an end and a text. Add it to Items.
DateTime start = DateTime.Today;
TimelineItem item = new TimelineItem(start, start.AddDays(5), "Write the plan");
timeline.Items.Add(item);
To keep more data on each item, add fields first. Then set the values with SetValue after the item is in Items.
timeline.Fields.Add(new TimelineField("Project") { TypeCode = TypeCode.String });
timeline.Fields.Add(new TimelineField("Resource") { TypeCode = TypeCode.String });
timeline.Fields.Add(new TimelineField("Percent") { TypeCode = TypeCode.Int32 });

TimelineItem task = new TimelineItem(start, start.AddDays(10), "Build the screens");
timeline.Items.Add(task);
task.SetValue("Project", "Website");
task.SetValue("Resource", "Anna");
task.SetValue("Percent", 40);
Read a value back with GetValue.
Group tasks by project
Add a TimelineGroup for a field. Each value of the field gets its own group row.
timeline.Groups.Add(new TimelineGroup(timeline.Fields["Project"]));Users can open and close each group. In code, call CollapseGroups or ExpandGroups for all groups, or CollapseGroup and ExpandGroup for one.
Show how much of a task is done
An item has a second bar for an estimated period. You can use it to show the finished part of a task.
timeline.ShowItemsEstimatedDurationBar = true;
timeline.ItemsDurationBarHeight = 12;

int percent = 40;
task.EstimatedStartTime = task.StartTime;
task.EstimatedEndTime = task.StartTime.AddTicks((task.EndTime - task.StartTime).Ticks * percent / 100);
ShowItemsDurationBar shows the bar for the planned period. It is on by default.
Color the tasks
Each item has three styles: FormatStyle for the item, ItemBarFomatStyle for the duration bar and ItemEstimatedBarFormatStyle for the estimated bar. ToolTipText sets the text that shows when the mouse rests on the item.
The timeline creates its items again from their data when the control gets its window. So set the style in the ItemRead event, from the values of the item.
using System.Drawing;

timeline.ItemRead += (sender, e) =>
{
    int done = e.Item.GetValue("Percent") is int value ? value : 0;
    Color color = done >= 100 ? Color.FromArgb(46, 139, 87) : Color.FromArgb(0, 114, 188);
    e.Item.ItemBarFomatStyle.BackColor = Color.FromArgb(200, color);
    e.Item.ItemEstimatedBarFormatStyle.BackColor = ControlPaint.Dark(color, 0.15f);
    e.Item.ToolTipText = e.Item.Text + "\n" + e.Item.GetValue("Resource");
};
Zoom the time scale
The time scale has up to three tiers. TimescaleTiers sets how many show.
| Value | Tiers that show |
|---|---|
TimescaleTiers.OneTier | BottomTier |
TimescaleTiers.TwoTiers | MiddleTier and BottomTier. This is the default. |
TimescaleTiers.ThreeTiers | TopTier, MiddleTier and BottomTier |
Each tier has an Interval and a CustomFormat. The interval is a TimelineInterval value: Year, Month, Week, Day, Hour, Minute or Second.
An upper tier must not have shorter steps than a tier below it. When you change several tiers at once, call SuspendTimescaleValidation first and ResumeTimescaleValidation after. If the tiers are not valid, ResumeTimescaleValidation puts the old tiers back and throws an ArgumentException.
timeline.SuspendTimescaleValidation();
timeline.TimescaleTiers = TimescaleTiers.ThreeTiers;
timeline.TopTier.Interval = TimelineInterval.Year;
timeline.TopTier.CustomFormat = "yyyy";
timeline.MiddleTier.Interval = TimelineInterval.Month;
timeline.MiddleTier.CustomFormat = "MMMM";
timeline.BottomTier.Interval = TimelineInterval.Week;
timeline.BottomTier.CustomFormat = "d MMM";
timeline.IntervalSize = 150;
timeline.ResumeTimescaleValidation();
IntervalSize sets the width of one step of the bottom tier, in percent. It accepts 25 to 1000, and the default is 100.
Lay out the rows
ItemLayoutMode sets how items share the rows.
| Value | Layout |
|---|---|
ItemLayoutMode.NewRowOnOverlap | A new row starts only when items overlap. This is the default. |
ItemLayoutMode.RowXItem | Each item gets its own row. |
ItemLayoutMode.AllItemsOnOneRow | All items share one row. |
ItemSizeMode sets the width of an item. ItemSizeMode.DurationBased follows the start and end. ItemSizeMode.TextBased follows the text and is the default. RowHeight sets the height of a row.
timeline.ItemLayoutMode = ItemLayoutMode.NewRowOnOverlap;
timeline.ItemSizeMode = ItemSizeMode.DurationBased;
timeline.RowHeight = 54;
Move through time
FirstDate is the first date on screen. LastDate gives the last one. EnsureVisible scrolls to a date or to an item.
timeline.FirstDate = DateTime.Today.AddDays(-14);
timeline.EnsureVisible(DateTime.Today);
timeline.HighlightCurrentTime = true;
timeline.ShowWeekNumbers = true;
HighlightCurrentTime marks the current time. MinDate and MaxDate limit the dates that the timeline can show.
Let users move and resize tasks
AllowEdit turns editing on or off. AllowItemDrag sets what a drag can do. Its values are flags, so you can join them with |.
| Value | What the user can do |
|---|---|
AllowItemDrag.None | Nothing. Items stay in place. |
AllowItemDrag.Move | Move an item to another time. |
AllowItemDrag.Resize | Drag an edge to change the length. |
AllowItemDrag.GroupChange | Move an item to another group. |
AllowItemDrag.EstimatedDurationChange | Change the estimated bar. |
AllowItemDrag.All allows all of these and is the default.
DroppingItem runs before a dragged item is dropped. Set Cancel to stop the drop. ItemChanged runs after a change.
timeline.DroppingItem += (sender, e) =>
{
    if (e.ProposedStartTime < DateTime.Today)
    {
        e.Cancel = true;
    }
};

timeline.ItemChanged += (sender, e) =>
{
    // Save e.Item to your data store here.
};
Bind the timeline to data
The timeline can read items from a data source such as a DataTable. Name the columns, then set DataSource.
timeline.StartTimeMember = "Start";
timeline.EndTimeMember = "End";
timeline.TextMember = "Name";
timeline.DataSource = table;
EstimatedStartTimeMember and EstimatedEndTimeMember fill the estimated bar. A change in a row shows in its item.
Was this page helpful?